
Deploy QuickUMLS (Medical Code Extraction) on GCP Cloud Run

QuickUMLs
QuickUMLS (Soldaini and Goharian, 2016) is a tool for fast, unsupervised biomedical concept extraction from medical text. It takes advantage of Simstring (Okazaki and Tsujii, 2010) for approximate string matching. For more details on how QuickUMLS works, we remand to our paper.
This project should be compatible with Python 3 (Python 2 is no longer supported) and run on any UNIX system (support for Windows is experimental, please report bugs!). If you find any bugs, please file an issue on GitHub or email the author at luca@ir.cs.georgetown.edu.
This blog demonstrates the process of deployment of QuickUMLS Docker image on GCP Cloud Run.
Steps to Deploy on Cloud Run
Step 1 - Pull & run the Docker image
For this step use Cloud Shell to launch the docker image.
Why Cloud Shell?
Cloud Shell provides complete development environment for developing application on various platforms (Java, Python, Go), Cloud Editor (VS Code on Cloud), Docker to build and run images. This helps in minimizing the time to setup a developer environment and it can be accessed anywhere as long as you have access to internet.
Steps to run QuickUMLS Docker image
- Launch Cloud Shell
- Run the docker image from Docker Hub, above command will pull and run the docker instance in detached mode on Port 5000.
docker run -p 5000:5000 -d aehrc/quickumls-rest:1.2.3-2018AA - Test the image by running curl command with sample input,
curl --location --request POST 'http://localhost:5000/match' \ --header 'Content-Type: application/json' \ --data-raw '{ "text":"Who is an expert for coronary angioplasty"}'[ { "cui": "C0002997", "end": 41, "ngram": "coronary angioplasty", "preferred": 1, "semtypes": [ "T061" ], "similarity": 1.0, "snomed_ct": [], "start": 21, "term": "coronary angioplasty" }, { "cui": "C0190211", "end": 41, "ngram": "coronary angioplasty", "preferred": 1, "semtypes": [ "T061" ], "similarity": 1.0, "snomed_ct": [ "68955014", "68956010", "68958011", "3297371018", "68957018", "271164014", "473416018", "348670015", "528904012", "728515012", "233336010", "620833014", "778116019", "3297345017", "557590016", "2709919019", "2716865011", "2750481019" ], "start": 21, "term": "coronary angioplasty" } ]
Step 2 - Expose the application using Cloud Run
What is Cloud Run?
Cloud Run is a fully managed compute platform for hosting and scaling your containerized applications. No explicit infrastructure provisioning is needed for using Cloud Run and you can literally host your application in seconds.
Steps to host application on Cloud Run
Cloud Run can only read images from Artifact Registry (Image repository for Docker), so in order to deploy applications on Cloud Run first the Docker image of the application should be saved in the Artifact Registry. This can be achieved using following commands,
- Retag image with Artifact Registry repo URL using,
docker tag aehrc/quickumls-rest:1.2.3-2018AA <loc>.pkg.dev/<proj>/<repo-name>/quickumls-rest:1.2.3-2018AAdocker image ls

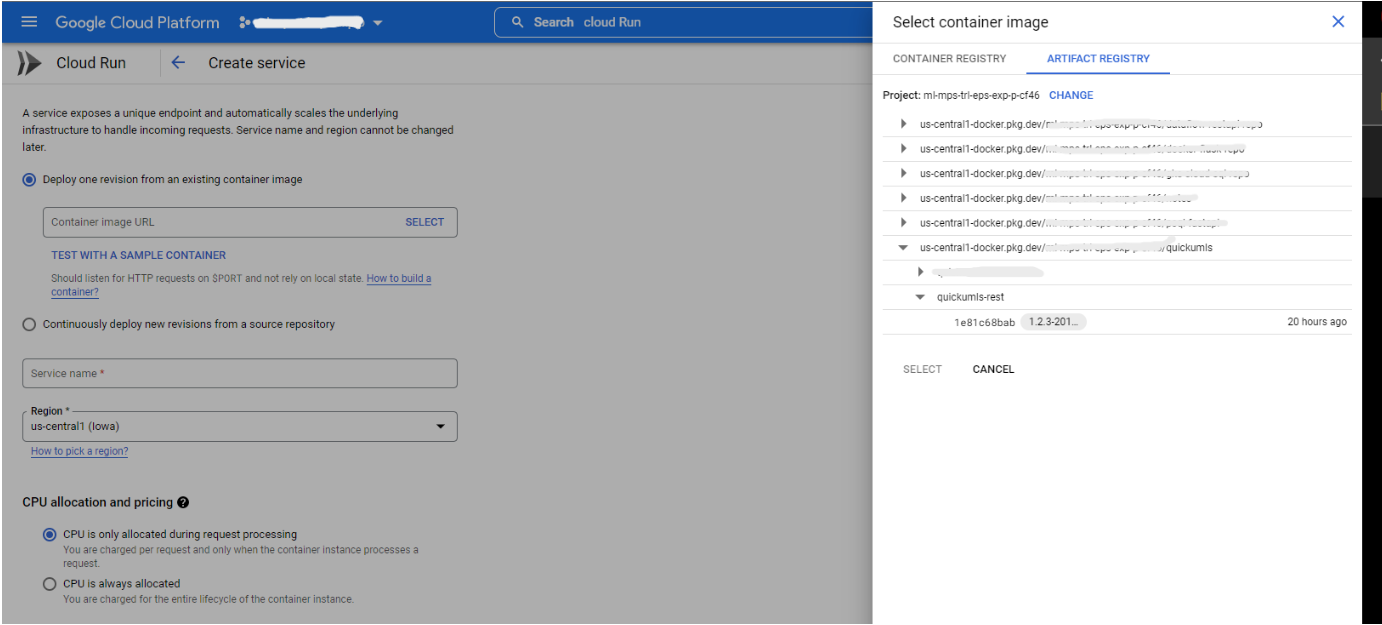
- In Google Cloud Console launch Cloud Run
- Select container image from Artifact registry
- Set Auto Scaling properties for minimum to maximum instances. Minimum instance are the least number of instances you want to keep running for your applications. Since Cloud Run is serverless, it will scale down all the instances to minimum automatically when not in use. The side effect of that would be for the first hit there would be a some lag until the application starts up and ready to take request. For this however we will leave it to 0.
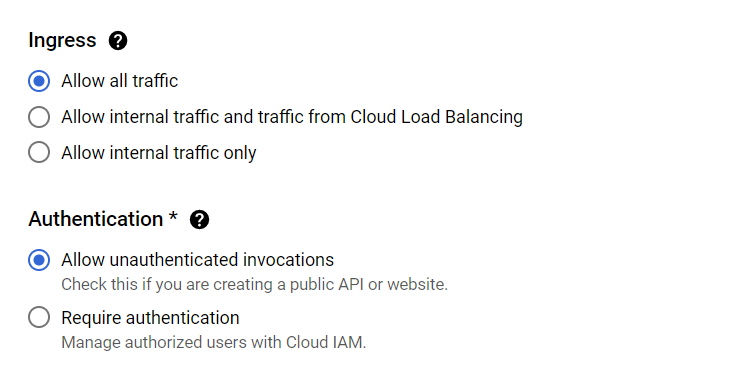
Expand the Container, Variables & Secrets section and move to Connections and select VPC Connector, This is required if you are accessing a resource in a VPC, also since the Ingress option is restricted to Allow all traffic.
Keep rest of the settings to default and click create
- This will return us a URL for accessing the application
Note
The Cloud Run application in the experimental tenant can't be accessed outside VPC since Ingress setting is set to Allow all Traffic
- To test if the application is working as expected, run the curl command or use Postman,
curl --location --request POST 'https://<cloud-run-app-url>/match' \ --header 'Content-Type: application/json' \ --data-raw '{ "text":"Who is an expert for coronary angioplasty"}'[ { "cui": "C0002997", "end": 41, "ngram": "coronary angioplasty", "preferred": 1, "semtypes": [ "T061" ], "similarity": 1.0, "snomed_ct": [], "start": 21, "term": "coronary angioplasty" }, { "cui": "C0190211", "end": 41, "ngram": "coronary angioplasty", "preferred": 1, "semtypes": [ "T061" ], "similarity": 1.0, "snomed_ct": [ "68955014", "68956010", "68958011", "3297371018", "68957018", "271164014", "473416018", "348670015", "528904012", "728515012", "233336010", "620833014", "778116019", "3297345017", "557590016", "2709919019", "2716865011", "2750481019" ], "start": 21, "term": "coronary angioplasty" } ]


