Deploy 2 FastAPI microservice in GKE with Ingress Controller and expose them using GCP API Gateway


Deploy 2 FastAPI microservice in GKE with Ingress Controller and expose them using GCP API Gateway
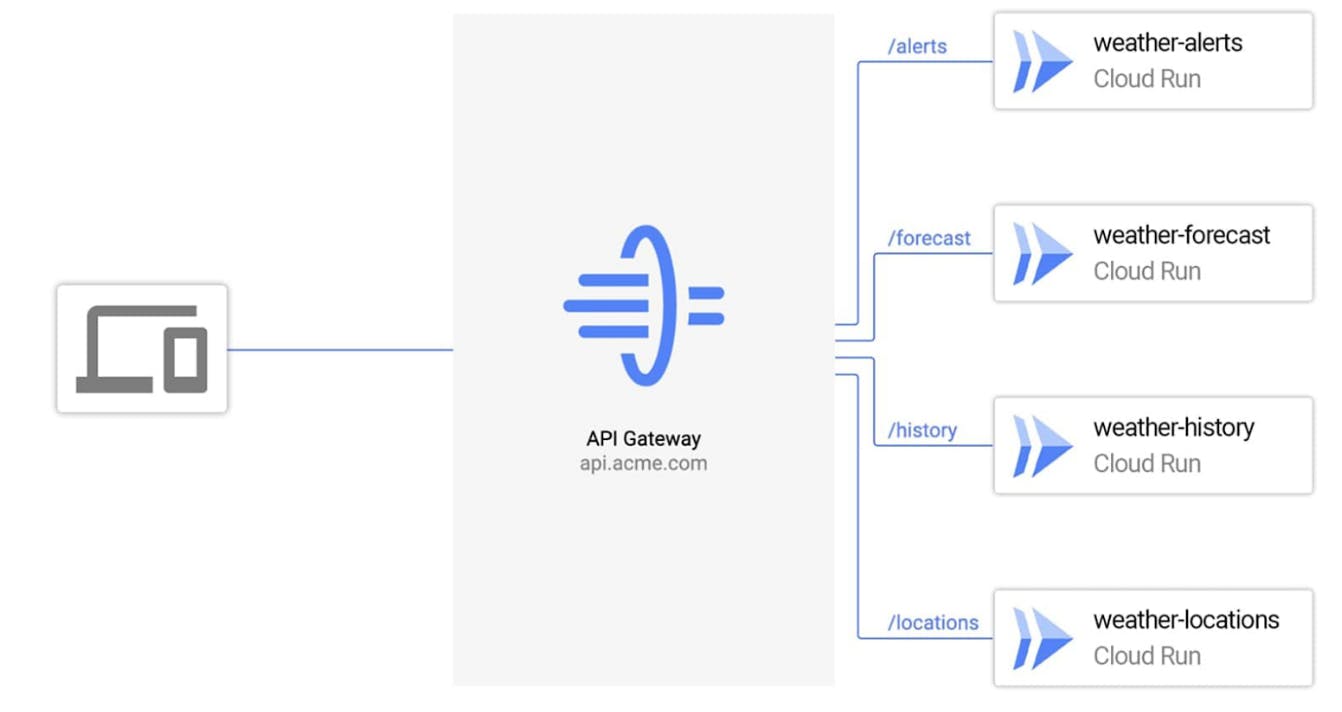
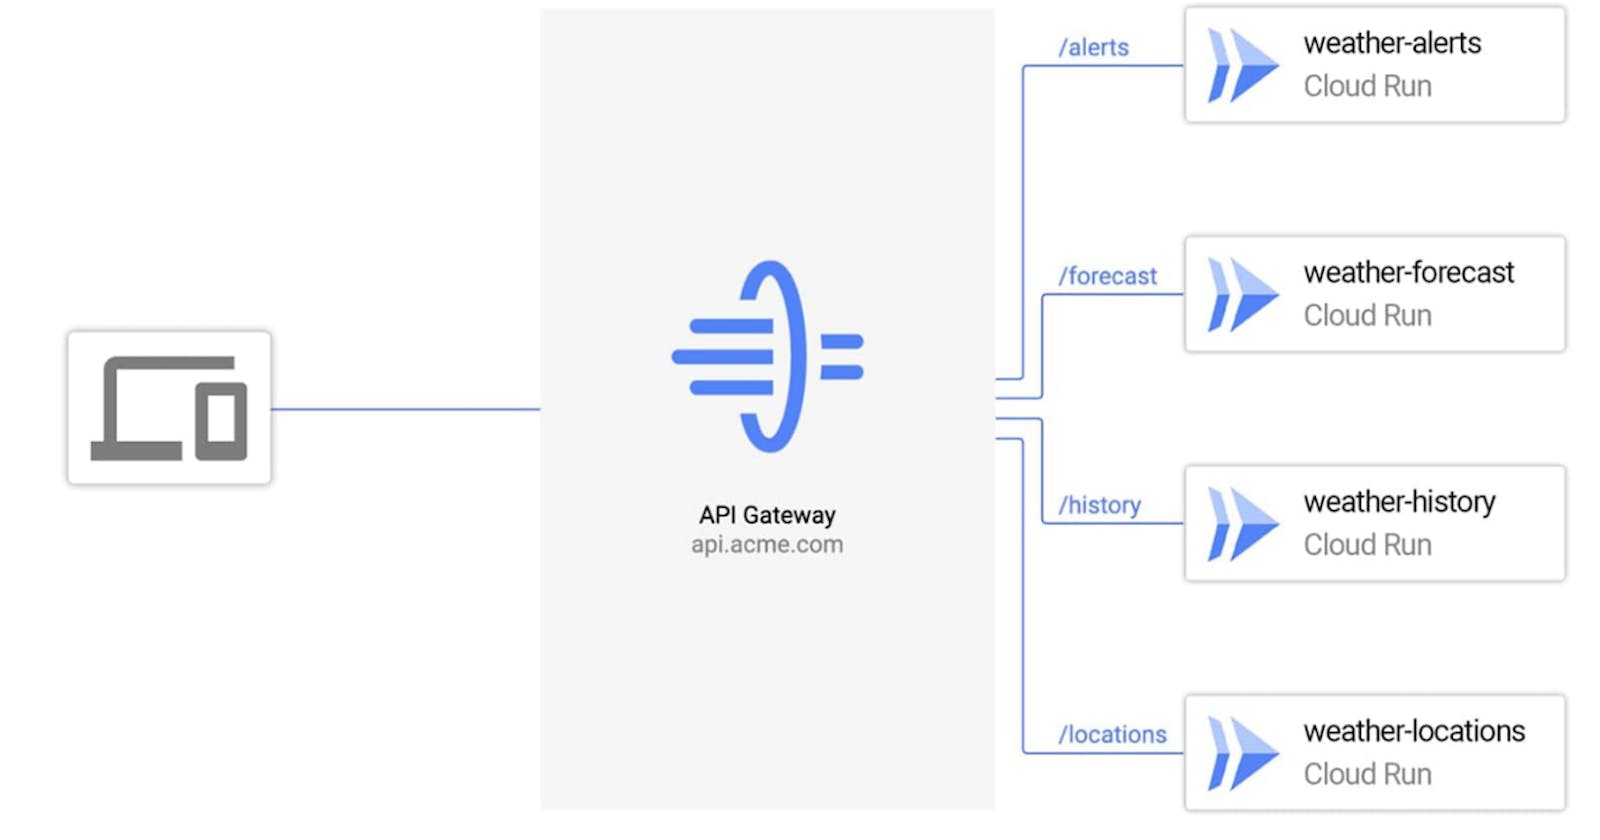
In this POC we will deploy two different Service in GKE (Google Kubernetes Service) and route it using api gateway and ingress controller
GCP Services used
- GKE
- API Gateway
Steps Summary
- Create two sample service
- Build Docker Image for both the service
- Push the Docker image to dockerhub
- Create deployment.yaml file for GKE Service
- Create ingress.yaml file for ingress rules for route mapping to the service
- Create gateway.yaml file for routes rules and services for each route
Step 1 Create two sample service using FlaskAPI In your care we created two different services namely notes and products notes service First create or install required packages from requirements.txt
pip install -r requirements.txt
requirements.txt
Flask
gunicorn
from flask import Flask,jsonify,request
import json
app = Flask(__name__)


data = [{
    "id":1,
    "notes":"sample notes",
    "completed":"true",
    }]


@app.route("/",methods=['GET'])
def health():
    return jsonify("healthy")

@app.route('/notes',methods = ['GET'])
def get_notes():
    return jsonify(data)

@app.route("/notes",methods=["POST"])
def add_notes():
    record = request.get_json()
    data.append({"id":record["id"],"notes":record["notes"],"completed":record["completed"]})
    return jsonify("data added success")

@app.route("/notes/<note_id>",methods=["GET"])
def get_note_by_id(note_id):
    print(note_id)
    for d in data:
        if d["id"] == int(note_id):
            return jsonify(d)
    return jsonify("no such notes found with id")

if __name__ == '__main__':
    app.run(host="0.0.0.0")
Once the required packages and code is ready, run it locally and test
python main.py
product service First create or install required packages from requirements.txt
pip install -r requirements.txt
requirements.txt
Flask
gunicorn
from flask import Flask,jsonify,request
import json
app = Flask(__name__)


data = [{
    "id":1,
    "product":"laptop",
    }]


@app.route("/",methods=['GET'])
def health():
    return jsonify("healthy")

@app.route('/products',methods = ['GET'])
def get_notes():
    return jsonify(data)

@app.route("/products",methods=["POST"])
def add_notes():
    record = request.get_json()
    data.append({"id":record["id"],"product":record["product"]})
    return jsonify("data added success")

@app.route("/products/<note_id>",methods=["GET"])
def get_note_by_id(note_id):
    print(note_id)
    for d in data:
        if d["id"] == int(note_id):
            return jsonify(d)
    return jsonify("no such products found with id")

if __name__ == '__main__':
    app.run(host="0.0.0.0")
Once the required packages and code is ready, run it locally and test
python main.py
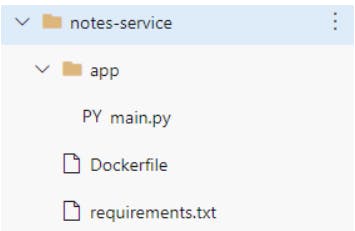
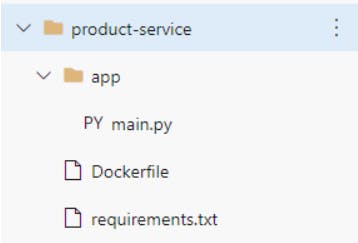
Step 2 notes-service Create Docker file and build the docker image Place all the codes and files in the following structure
notes-service/
    --Dockerfile
    --requirements.txt
    --app/
       --main.py
 Create a docker file and place the below code
Dockerfile
Create a docker file and place the below code
Dockerfile
# Select Image
FROM python:3.7.12-slim

# mode to code dir
WORKDIR /code

# copy the requirement.txt file
COPY ./requirements.txt /code/requirements.txt

# run the pip install command
RUN pip install --no-cache-dir --upgrade -r /code/requirements.txt

# copy the app dir
COPY ./app /code/app

# expose the port
EXPOSE 5000

# run the service using uvicorn
CMD ["python","app/main.py"]
to build the docker image run the command , make sure to be in the same directory as the Dockerfile
sudo docker build -t notes:0.1 .
check if the image is build
sudo docker images
to run the docker image and test
sudo docker run -d -p 5000:5000 notes:0.1
a container will be created and to check and list the container id, run the command
sudo docker ps
then to test the api run the curl command
curl -v http://0.0.0.0/notes
the curl will respond back with
{
            "id":1,
            "note":"sample note",
            "completed":"true"
 }
if you get similar response then the docker image is built and running successfully
product-service Create Docker file and build the docker image Place all the codes and files in the following structure
products-service/
    --Dockerfile
    --requirements.txt
    --app/
       --main.py
 Create a docker file and place the below code
Dockerfile
Create a docker file and place the below code
Dockerfile
# Select Image
FROM python:3.7.12-slim

# mode to code dir
WORKDIR /code

# copy the requirement.txt file
COPY ./requirements.txt /code/requirements.txt

# run the pip install command
RUN pip install --no-cache-dir --upgrade -r /code/requirements.txt

# copy the app dir
COPY ./app /code/app

# expose the port
EXPOSE 5000

# run the service using uvicorn
CMD ["python","app/main.py"]
to build the docker image run the command , make sure to be in the same directory as the Dockerfile
sudo docker build -t products:0.1 .
check if the image is build
sudo docker images
to run the docker image and test
sudo docker run -d -p 5000:5000 products:0.1
a container will be created and to check and list the container id, run the command
sudo docker ps
then to test the api run the curl command
curl -v http://0.0.0.0/products
the curl will respond back with
{
            "id":1,
            "note":"sample note",
            "completed":"true"
 }
if you get similar response then the docker image is built and running successfully
Step 3 Deploy Both the services to DockerHub to push first you should have a account in dockerhub is not use the link and create an account hub.docker.com notes-service create a new public repository named notes in my case the repo name is : amanulla1997/notes:0.1
to push docker image to dockerhub run the command
# sudo docker tag local-image:tag docker-repo/repo-name:tag
sudo docker tag notes:0.1 amanulla1997/notes:0.1
# sudo docker push docker-repo/repo-name:tag
sudo docker push amanulla1997/notes:0.1
product-service create a new public repository named products in my case the repo name is : amanulla1997/products:0.1
to push docker image to dockerhub run the command
# sudo docker tag local-image:tag docker-repo/repo-name:tag
sudo docker tag products:0.1 amanulla1997/products:0.1
# sudo docker push docker-repo/repo-name:tag
sudo docker push amanulla1997/products:0.1
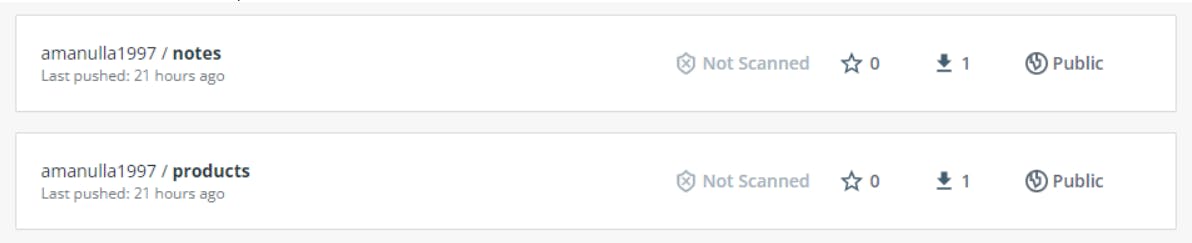
Screenshot of DockerHub Repo
step 4 Create deployment.yaml file for each service and deploy it as a GKE Service notes-service
apiVersion: apps/v1
kind: Deployment
metadata:
  creationTimestamp: null
  labels:
    app: notes-gateway
  name: notes-gateway
spec:
  replicas: 1
  selector:
    matchLabels:
      app: notes-gateway
  strategy: {}
  template:
    metadata:
      creationTimestamp: null
      labels:
        app: notes-gateway
    spec:
      containers:
      - name: sample-notes
        image: amanulla1997/notes:0.1
---
apiVersion: v1
kind: Service
metadata:
  name: gateway-notes-service
spec:
  ports:
  - port: 80
    targetPort: 5000
    protocol: TCP
    name: http
  selector:
    app: notes-gateway
  type: NodePort
deploy the notes-service-deployment.yaml file
kubectl apply -f notes-service-deployment.yaml
products-service
apiVersion: apps/v1
kind: Deployment
metadata:
  creationTimestamp: null
  labels:
    app: products-gateway
  name: products-gateway
spec:
  replicas: 1
  selector:
    matchLabels:
      app: products-gateway
  strategy: {}
  template:
    metadata:
      creationTimestamp: null
      labels:
        app: products-gateway
    spec:
      containers:
      - name: sample-products
        image: amanulla1997/products:0.1
---
apiVersion: v1
kind: Service
metadata:
  name: gateway-products-service
spec:
  ports:
  - port: 80
    targetPort: 5000
    protocol: TCP
    name: http
  selector:
    app: products-gateway
  type: NodePort
deploy the products-service-deployment.yaml file
kubectl apply -f products-service-deployment.yaml
step 5 Create and deploy ingress yaml file maping the routes with their respective services ingress.yaml
apiVersion: networking.k8s.io/v1
kind: Ingress
metadata:
  name: my-ingress
spec:
  rules:
  - http:
      paths:
      - pathType: Prefix
        path: /products
        backend:
          service:
            name: gateway-products-service
            port:
              number: 80
      - pathType: Prefix
        path: /notes
        backend:
          service:
            name: gateway-notes-service
            port:
              number: 80
Deploy the ingress.yaml file
kubectl apply -f ingress.yaml
step 6
Create one single api gateway openAPI swagger yaml file for both the services with all the routes and their mapping with the ingress url/load balancer gateway.yaml
swagger: "2.0"
info:
  description: "API Gatepoints"
  title: "Endpoints for Microservices"
  version: "1.0.0"
consumes:
  - "application/json"
produces:
  - "application/json"
schemes:
  - "http"
paths:
  "/api/notesservice/notes":
    get:
      description: "Returns the notes information."
      operationId: "get_all_notes"
      x-google-backend:
        address: http://34.110.194.28.nip.io/notes
      produces:
        - "application/json"
      responses:
        200:
          description: "Notes info."
          schema:
            $ref: "#/definitions/notesResponse"
      security:
        - api_key: []
          google_jwt: []
    post:
      description: "Returns the notes information."
      operationId: "create_note"
      x-google-backend:
        address: http://34.110.194.28.nip.io/notes
      produces:
        - "application/json"
      responses:
        200:
          description: "Notes info."
          schema:
            $ref: "#/definitions/notesResponse"
      security:
        - api_key: []
          google_jwt: []
  "/api/productsservice/products":
    get:
      description: "Returns the products information."
      operationId: "get_all_products"
      x-google-backend:
        address: http://34.110.194.28.nip.io/products
      produces:
        - "application/json"
      responses:
        200:
          description: "products info."
          schema:
            $ref: "#/definitions/productsResponse"
      security:
        - api_key: []
          google_jwt: []
    post:
      description: "Returns the products information."
      operationId: "create_Product"
      x-google-backend:
        address: http://34.110.194.28.nip.io/products
      produces:
        - "application/json"
      responses:
        200:
          description: "Products info."
          schema:
            $ref: "#/definitions/productsResponse"
      security:
        - api_key: []
          google_jwt: []

definitions:
  notesResponse:
    type: "object"
    properties:
      id:
        title: Id
        type: integer
      text:
        title: Text
        type: string
      completed:
        title: Completed
        type: string
  productsResponse:
    type: "object"
    properties:
      id:
        title: Id
        type: integer
      product:
        title: Product
        type: string
To deploy the api gateway we can using gcloud cli or the GUI api gateway
- Deploy using Gcloud
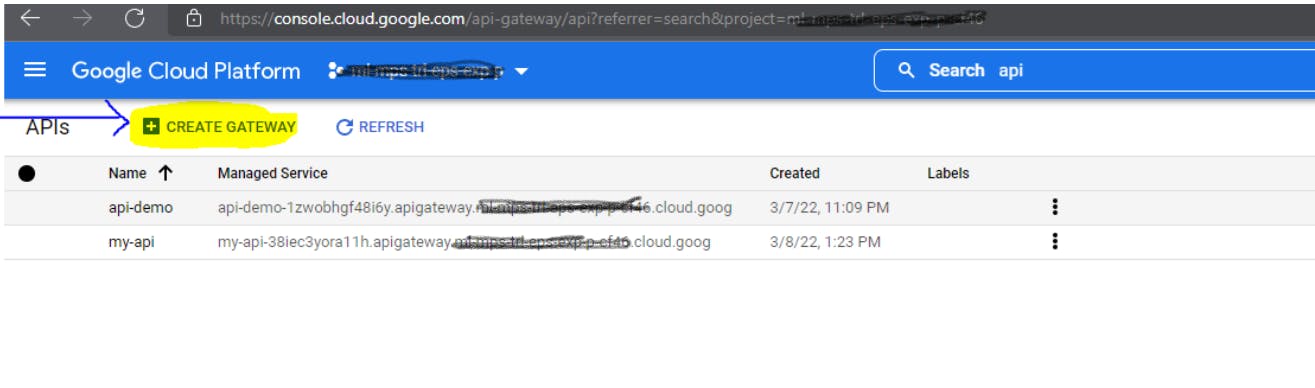
gcloud api-gateway <api-gateway-name> create <config-name> --api=<api-name>--openapi-spec=<path-to-yaml> --project=<project-id>gcloud api-gateway api-configs create my-config --api=my-api --openapi-spec=gateway.yaml --project=ml-mps-trl-eps-exp-p-cf46 - Deploy using API Gateway Service GCP GUI First search for api gateways and redirect to the page Then click on CREATE GATEWAY
 Then fill the values
API - Display Name : my-api
API - API ID : my-api-id
API Config - Upload an API Spec : upload the gateway.yaml file
API Config - Display Name : my-config
API Config - Service Account : select one service account which has required permission
Gateway details - Display Name : my-gateway
Gateway details - Location : select any one
Click on Create Gateway (it takes 3-5 mins to create)
Then fill the values
API - Display Name : my-api
API - API ID : my-api-id
API Config - Upload an API Spec : upload the gateway.yaml file
API Config - Display Name : my-config
API Config - Service Account : select one service account which has required permission
Gateway details - Display Name : my-gateway
Gateway details - Location : select any one
Click on Create Gateway (it takes 3-5 mins to create)
Once Gateway is created click on the gateway and select gateway options
Next to get the API gateway URL
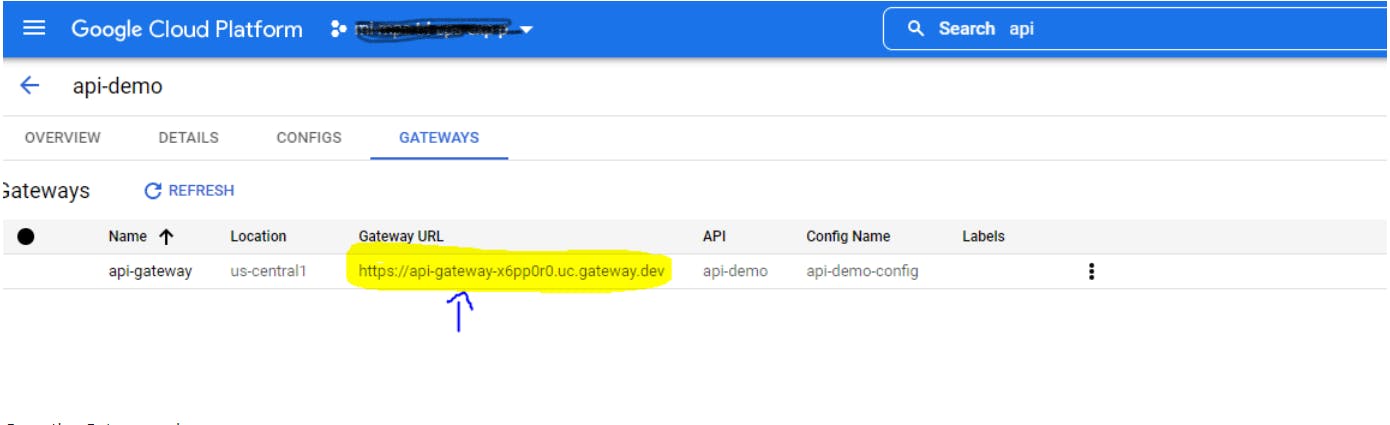
Copy the Gateway url
step 7
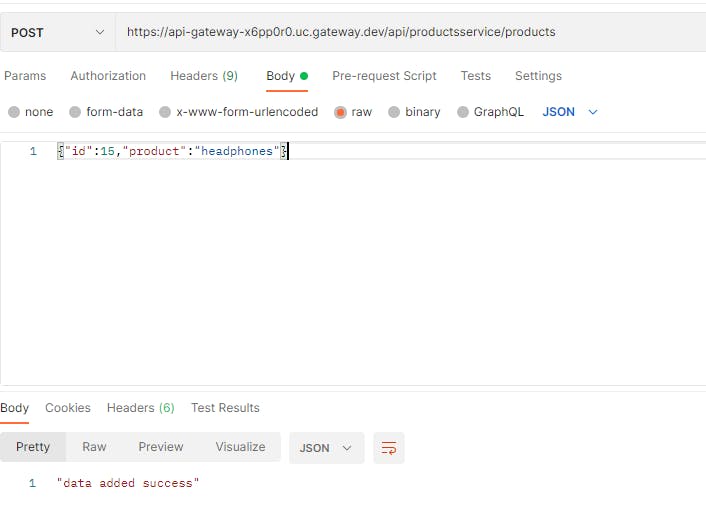
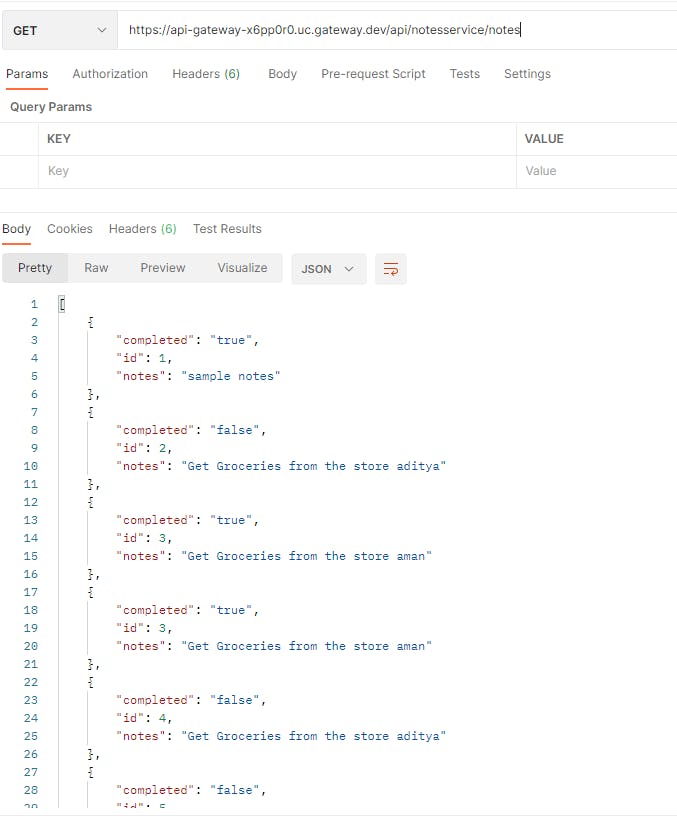
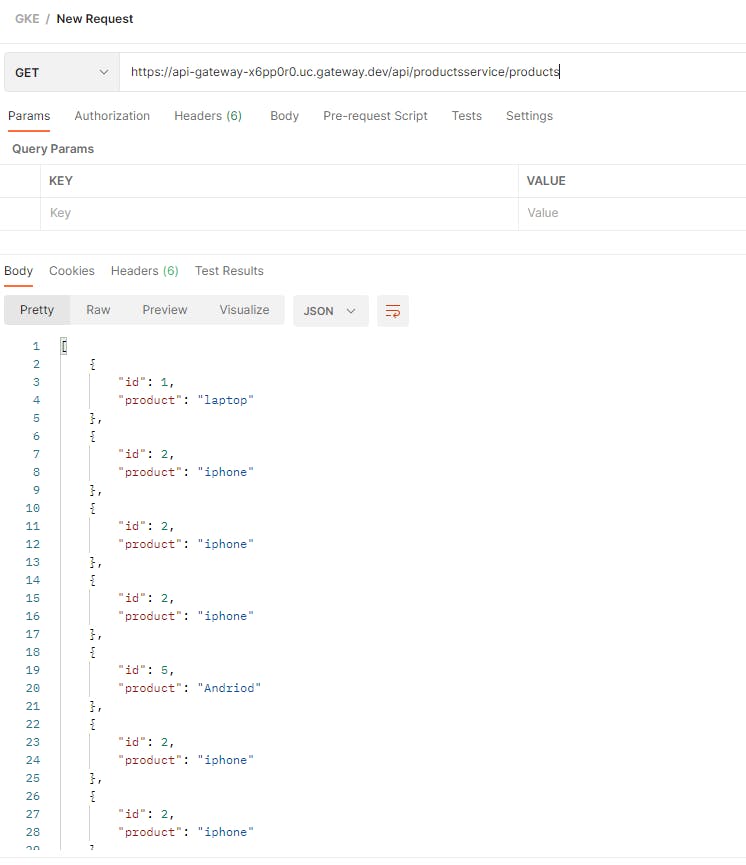
Test the API Gateway url in postman
GET - https://api-gateway-x6pp0r0.uc.gateway.dev/api/notesservice/notes
GET - https://api-gateway-x6pp0r0.uc.gateway.dev/api/productsservice/products
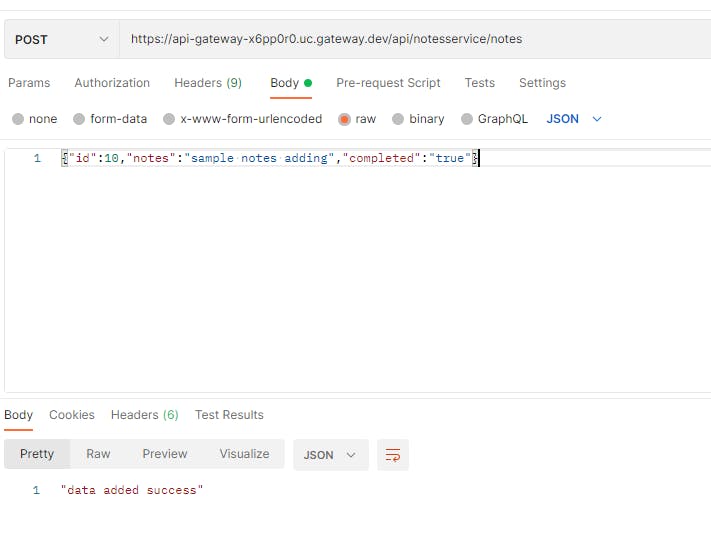
POST - https://api-gateway-x6pp0r0.uc.gateway.dev/api/notesservice/notes
DATA - {"id":10,"notes":"sample notes adding","completed":"true"}
HEADER - Content-Type : application/json
POST - https://api-gateway-x6pp0r0.uc.gateway.dev/api/productsservice/products
DATA - {"id":15,"product":"headphones"}
HEADER - Content-Type : application/json